Hi, this blog will explain, how to configure WSO2 Identity
Server for Lock/Unlock user accounts that are available.
Environment: WSO2 Identity Server 5.0.0, SoapUI 5.0.0.
We can achieve this by sending a SOAP request. Admin can
lock the user account by modifying the account lock attribute of the user. Then
user can’t be authenticated. Admin can
again unlock it when it is needed.
However, if user has already authenticated session, admin
may not able to terminate it and it will remains till it is expired.
Please follow the steps given below,
1. Goto <IS_HOME>/repository/conf/carbon.xml file and
disable the hide admin services property.
<HideAdminServiceWSDLs>false</HideAdminServiceWSDLs>
2. Goto <IS_HOME>/repository/conf/security/identity-mgt.properties
file and enable the identity listener.
Identity.Listener.Enable=true
3. Start the Identity Server.
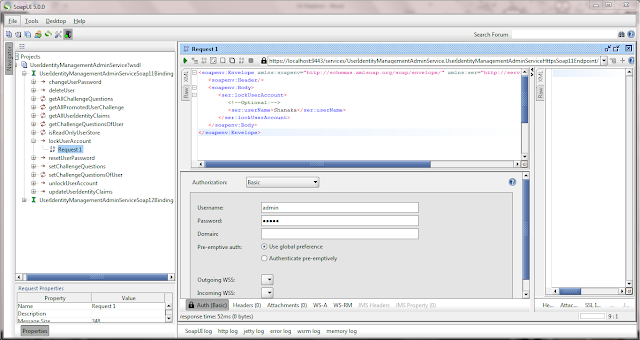
4. Create new SOAP project in SoapUI using “https://localhost:9443/services/UserIdentityManagementAdminService?wsdl”.
5. Use “lock user account” request under
UserIdentityManagementAdminServiceSoap11Bindings and add new Authorization with
below configurations,
Authorization
Type: Basic
UserName: Admin
user name
Password: Admin
password
6. Use below request with the username that needs to be lock.
<soapenv:Envelope
xmlns:soapenv="http://schemas.xmlsoap.org/soap/envelope/"
xmlns:ser="http://services.mgt.identity.carbon.wso2.org">
<soapenv:Header/>
<soapenv:Body>
<ser:lockUserAccount>
<!--Optional:-->
<ser:userName>username</ser:userName>
</ser:lockUserAccount>
</soapenv:Body>
</soapenv:Envelope>
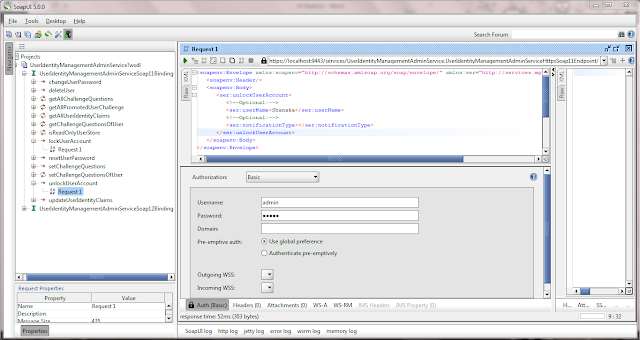
7. Same as the above, you can use “unlock user account”
request under UserIdentityManagementAdminServiceSoap11Bindings to unlock user.
Admin can use management console to lock/unlock account by
modifying the user's account lock attribute via user profile view. If you just
want to do that way, please follow the steps given below,
1. Goto
<IS_HOME>/repository/conf/security/identity-mgt.properties file and
enable the identity listener.
Identity.Listener.Enable=true
Authentication.Policy.Enable=true
2. Start the Identity Server.
3. Login as admin and go to configure tab and select claim
Management. Then select 'http://wso2.org/claims' link and click edit the ‘Account
Lock claim’. Click the Supported by
Default checkbox and save the changes.
4. Then go to User profile Edit page and type ‘true’ in Account
Locked Field. Then the user is locked. (For the first time you have to lock user by entering ‘true’
in account lock field, After that it will be a checkbox)
If you need to do some additional configuration. You can refer,


I uses http://codebeautify.org/base64-decode for base64 decode.
ReplyDelete